Dive into the world of homemade pasta and elevate your culinary skills with this comprehensive guide that unlocks the secrets to creating perfect pasta from scratch. Once you’ve discovered the satisfaction of transforming simple ingredients like flour, eggs, and water into delicious, restaurant-quality pasta, you’ll never want to go back to store-bought again.
Choosing the Right Flour
The foundation of any great homemade pasta begins with the right flour. There are various types of flour you can use, each imparting a unique texture and taste.
- All-purpose flour: The most common choice for making pasta, all-purpose flour is versatile and produces a smooth, tender pasta. If you’re just starting your pasta-making journey, this is a great option.
- Semolina flour: Made from durum wheat, semolina flour gives pasta a slightly coarser texture and a more robust flavor. It’s the go-to choice for many Italian pasta makers.
- ’00’ flour: Also known as doppio zero, ’00’ flour is finely milled and results in a silky, smooth pasta dough. It’s popular for making delicate, thin pasta like fresh egg noodles and fettuccine.
The Basic Pasta Dough Recipe
To create your pasta dough, follow this simple recipe:
- 2 cups of flour (choose the type based on your preference)
- 3 large eggs
- A pinch of salt
- 1 tablespoon of olive oil (optional)
- Create a well in the center of your flour on a clean work surface. Crack the eggs into the well, and add the salt and olive oil (if using).
- Using a fork, whisk the eggs while gradually incorporating the flour from the sides of the well. Once the dough starts to come together, use your hands to fold in the remaining flour.
- Knead the dough for about 10 minutes or until it becomes smooth and elastic. If it’s too sticky, add a bit more flour. If it’s too dry, add a few drops of water. Once you’ve achieved the right consistency, wrap the dough in plastic wrap and let it rest for 30 minutes to an hour.
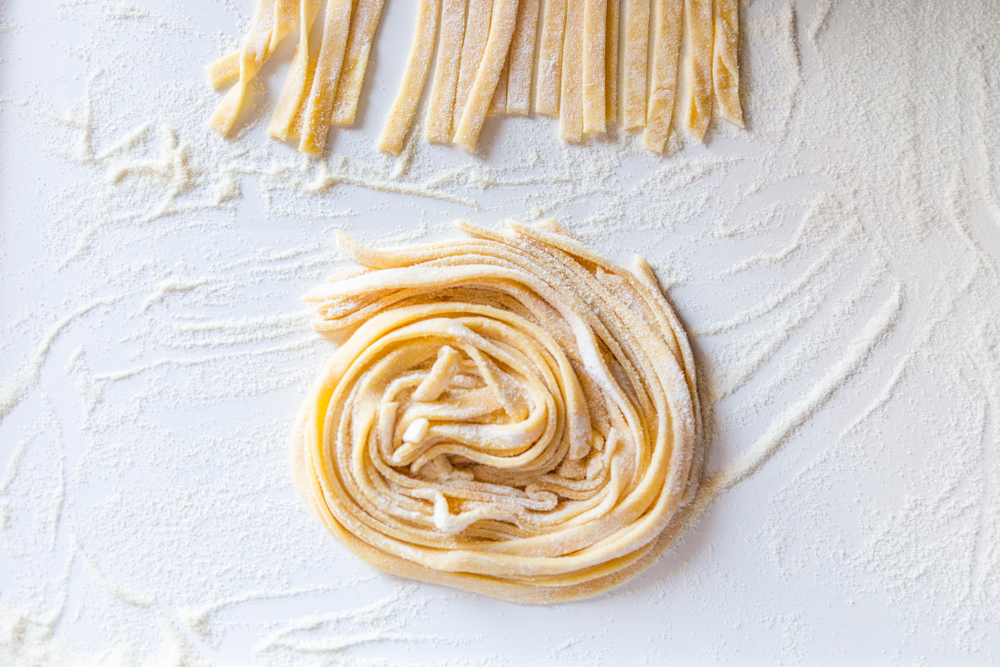
Rolling and Shaping the Pasta
After your dough has rested, it’s time to roll it out and shape it into your desired pasta. There are two primary methods for rolling out pasta dough: using a pasta machine or rolling it out by hand with a rolling pin.
- Pasta machine: Cut your dough into smaller, manageable pieces. Flatten each piece slightly and feed it through the pasta machine on its widest setting. Fold the dough into thirds and pass it through the machine again. Repeat this process several times, gradually narrowing the machine’s settings until you’ve reached your desired pasta thickness. Then, switch to the cutting attachment to create your desired pasta shape.
- Rolling pin: Divide your dough into smaller portions and use a rolling pin to roll out each piece on a lightly floured surface. Roll the dough as evenly and thinly as possible. Once you’ve achieved the desired thickness, use a sharp knife or a pasta cutter to slice the dough into your chosen pasta shape.
Cooking Fresh Pasta
Fresh pasta cooks quickly compared to dried pasta, so be sure to have your sauce prepared and ready to go. Bring a large pot of salted water to a rolling boil and gently add your fresh pasta. Stir gently to prevent sticking, and cook for 2-4 minutes, depending on the pasta’s thickness. Fresh pasta should have a tender, slightly chewy texture when properly cooked.
Drain the pasta, reserving a cup of the pasta water. Toss your pasta with the sauce, adding a splash of pasta water if needed to loosen the sauce and create a silky consistency and ensure it clings to the pasta. Serve your homemade pasta immediately, garnishing with fresh herbs, grated cheese, or a drizzle of extra-virgin olive oil, and savor the incredible flavors and textures you’ve created from scratch.